Looking to set up an Oracle 19c database on Windows ? This comprehensive guide walks you through the entire process using Oracle’s Database Configuration Assistant (DBCA) tool.
Whether you’re installing a fresh database during Oracle software setup or creating one afterward, this tutorial covers everything—from initial configuration to final testing.
Prerequisites
Before proceeding, ensure you meet the minimum system requirements. If you haven’t installed Oracle 19c yet, follow my Oracle 19c Installation Guide on Windows first.
Step 1: Launching DBCA
After installing Oracle 19c, open the Database Configuration Assistant (DBCA) using one of these methods:
- Start Menu: Search for DBCA in Windows.
- Command Prompt: Run dbca.
- Run Dialog: Press Windows + R, then type dbca.
(Log in as an administrator to proceed.)
Step 2: Select “Create a Database”
- Choose “Create a database” and click Next.

Step 3: Choose Configuration Mode
DBCA offers two setup options:
- Typical Configuration: Quick setup using Oracle’s prebuilt templates.
- Advanced Configuration: Full customization of storage, management, and security settings.

(For this guide, we’ll use Advanced Configuration.)
Step 4: Select Database Deployment Type
Choose:
- Database Type: Oracle Single Instance Database (default).
- Template: General Purpose or Transaction Processing.

(You can also explore Data Warehouse or Custom Database templates.)
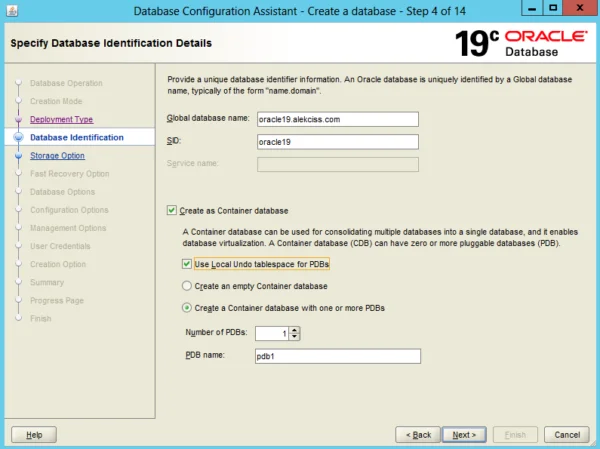
Step 5: Specify Database Identification
- Enter a Global Database Name (e.g., mydb.yourdomain.com).
- The SID is auto-generated.
- For a Multitenant Database (CDB), check “Create as Container Database” and specify the number of pluggable databases (PDBs).
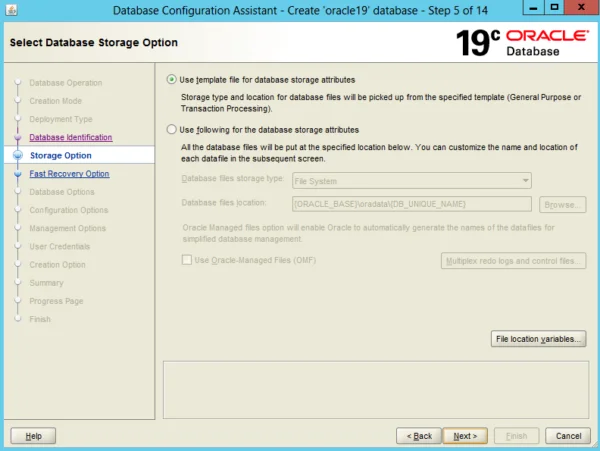
Step 6: Configure Storage Options
Select:
- “Use template file for database storage attributes” (recommended for beginners).
- Alternatively, choose File System, ASM, or OMF for custom storage management.
Step 7: Set Up Fast Recovery (Backup & Archiving)
- Enable Fast Recovery Area (for backups).
- Specify a recovery directory and size.
- Optionally, enable archiving for redo logs (critical for recovery).

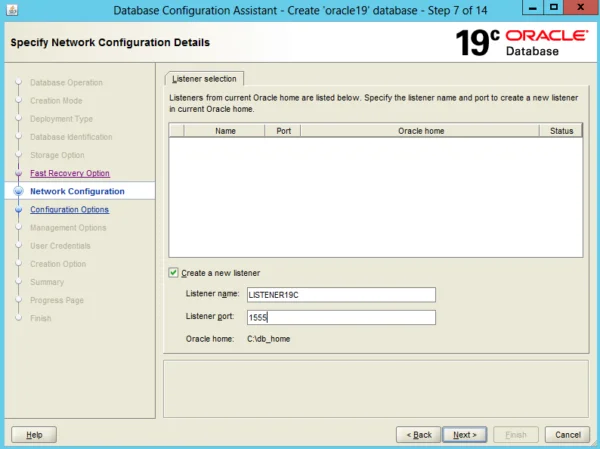
Step 8: Network Configuration (Listener Setup)
- Select an existing listener or create a new one (required for remote access).
- Assign a port number (default: 1521).
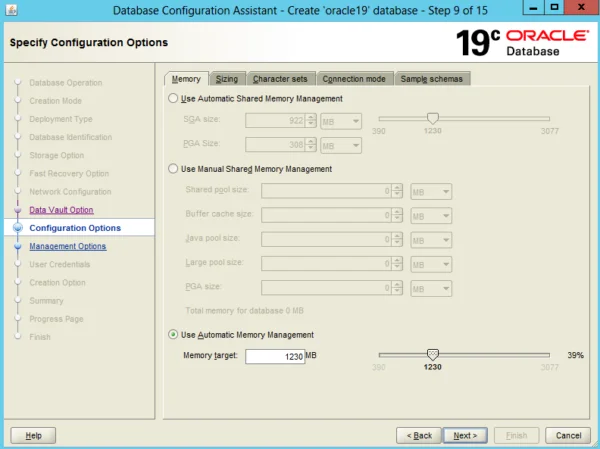
Step 9: Configure Memory, Character Sets & More
Memory Allocation
- Automatic Memory Management (AMM): Let Oracle optimize memory.
- Manual: Customize SGA/PGA allocations.
Sizing
This section lets you define:
- Database Block Size: Determines the size of data blocks (default is typically 8KB).
- Maximum User Processes: Sets the limit for concurrent connections to the database.

Key Considerations:
- The maximum processes setting must account for:
- Background processes (required for Oracle operations).
- User sessions (active connections).
- Parallel execution processes (if using parallel queries).
- Setting it too low can prevent the database from starting or cause connection failures.
- Choose a value that accommodates expected workload demands.
(For optimal performance, align this setting with your system’s capacity and user load.)
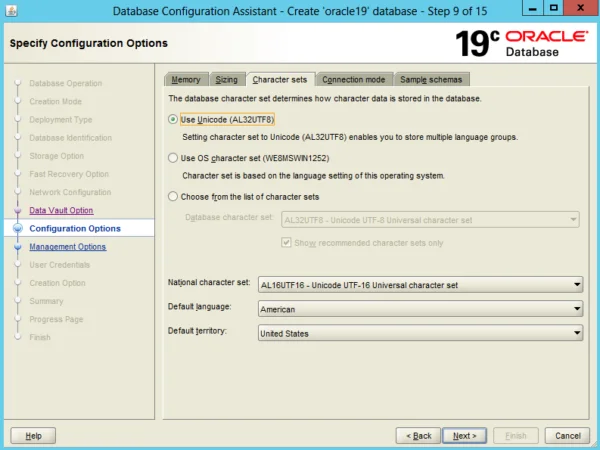
Character Sets
- Recommended: Unicode (AL32UTF8) for global compatibility.
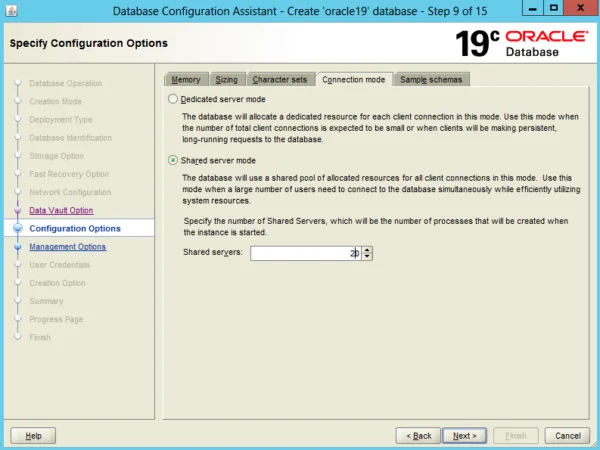
Connection Mode
- Dedicated Server: Best for low-user environments.
- Shared Server: Ideal for high-load systems.
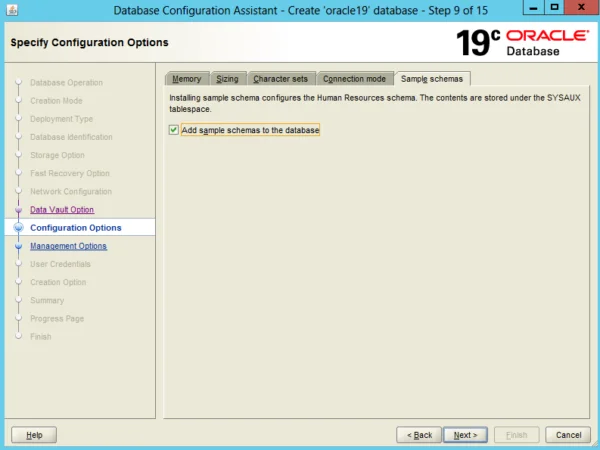
Sample Schemas (Optional)
- Enable HR, OE, etc. for practice databases.
Step 10: Management Options
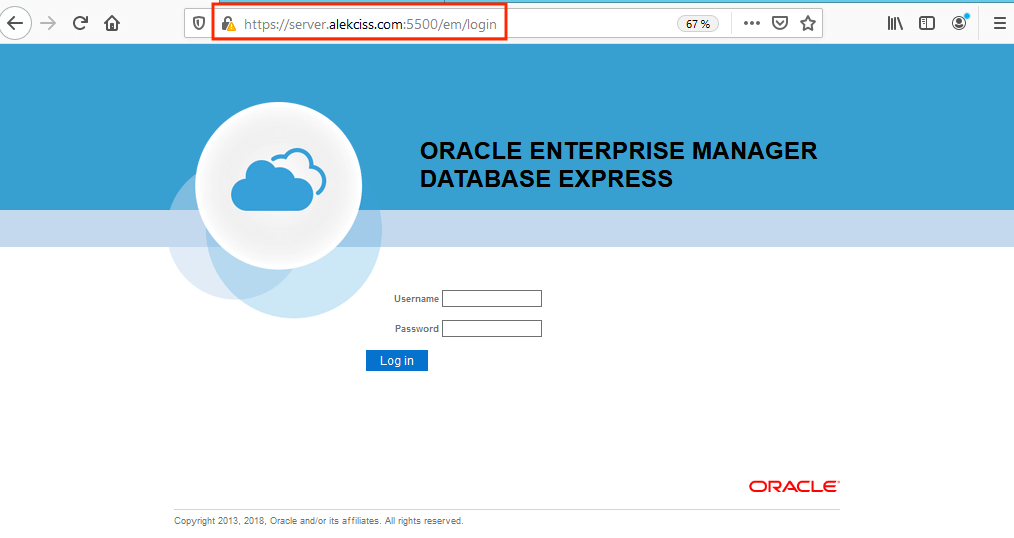
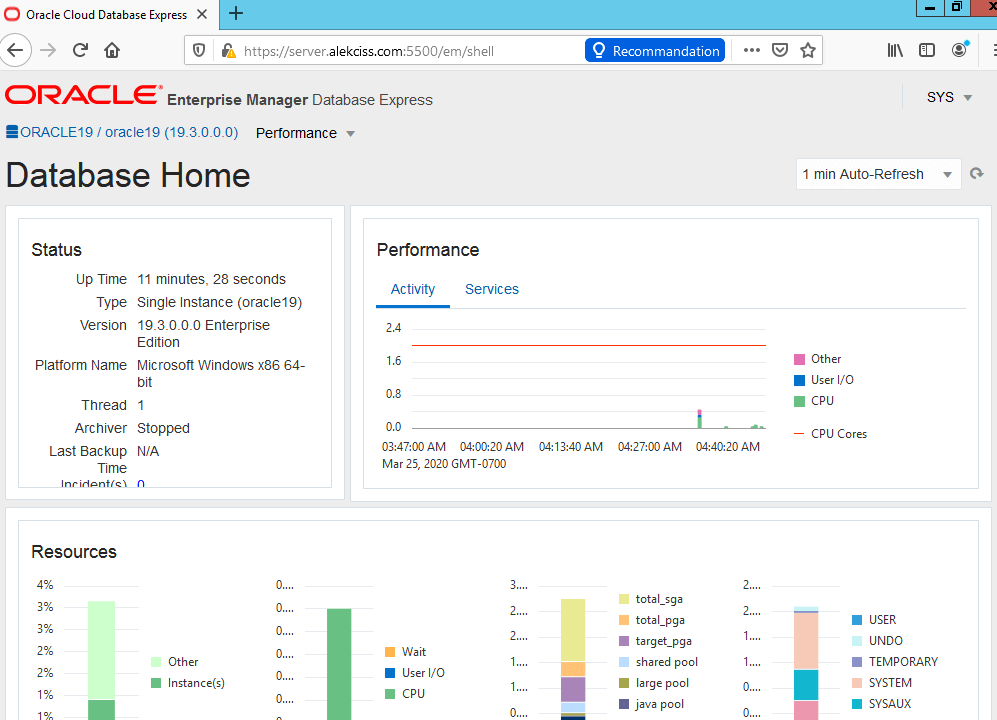
- Enable Enterprise Manager (EM) Express for web-based administration.
- (Skip if using EM Cloud Control.)

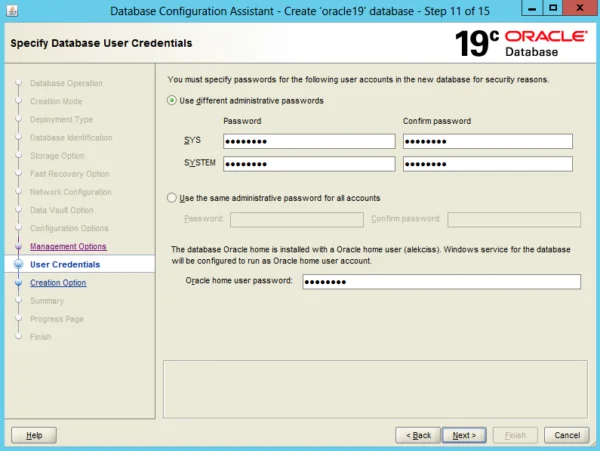
Step 11: Set Admin Passwords
- Assign secure passwords for SYS, SYSTEM, and other admin accounts.
- (Avoid using the same password for all accounts.)
Step 12: Finalize Database Creation
Choose:
- Create Database Now (recommended).
- Save as Template (for future use).
- Generate Scripts (manual execution later).

Step 13: Review & Finish
Verify all settings and click Finish to begin database creation.
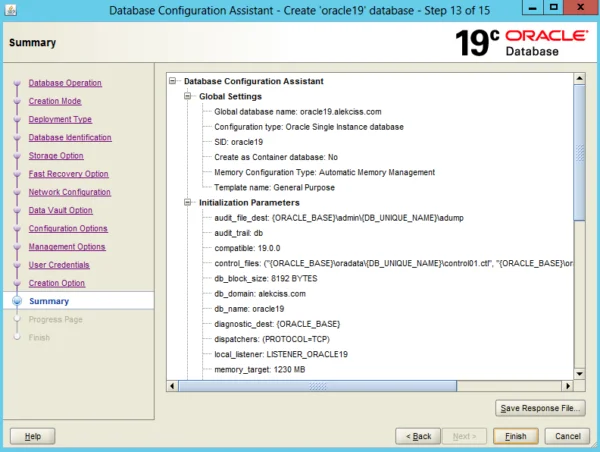

(This may take several minutes.)
Step 14: Test Your Database
Once complete:
- Connect via SQLPlus:sqlCopyDownloadsqlplus sys as sysdba
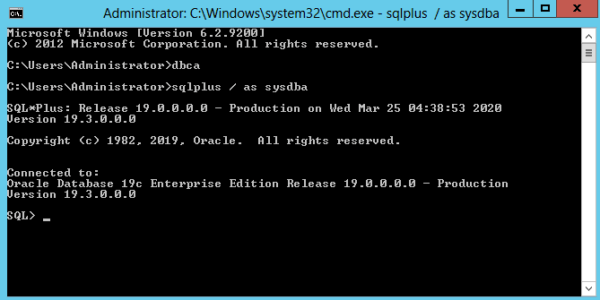
- Access EM Express: Open the provided EM Express URL in a browser.