Installing Oracle Database isn’t as straightforward as setting up other database systems like SQL Server or MySQL. While the process itself is logical, Oracle’s official documentation can be overwhelming – spanning hundreds of pages with dense technical details.
If you’re looking for a clear, concise guide to installing Oracle 19c on Windows, you’re in the right place. By the end of this tutorial, you’ll have a fully functional Oracle Database 19c installation, ready for database creation and administration.
Prerequisites
Before we begin, ensure your Windows server meets Oracle 19c’s system requirements. Skipping this step could lead to installation failures or performance issues.
📌 Related: Oracle Database 19c on Windows : Installation Requirements You Must Know
Step 1: Download Oracle Database 19c Software
First, grab the Oracle 19c installation package from Oracle’s official download page:
🔗 Oracle Database 19c Downloads
Look for:
✅ Oracle Database 19c for Microsoft Windows x64 (64-bit)
*(Need remote access? You may also want the Oracle 19c Client for x64 or 32-bit systems.)*
⚠️ Note:
- The software is free to download, but production use requires a license.
- You’ll need an Oracle account to proceed.
Step 2: Launch the Setup Wizard
Once downloaded:
- Unzip the package and copy it to your disk’s root (e.g., C:\).
- Rename the folder to something simple (e.g., db_home).
- Run setup.exe to start the installer.
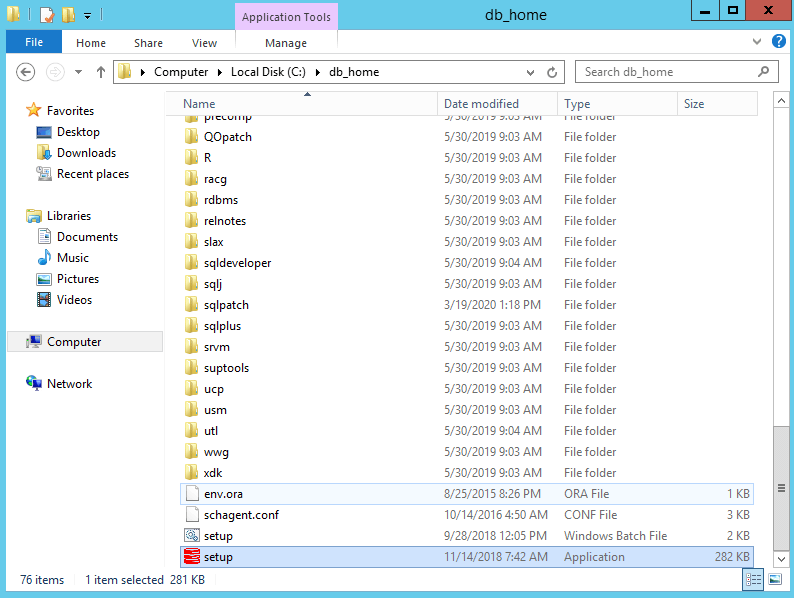
💡 The wizard may take a few minutes to load—be patient!
Step 3: Choose Installation Options
You’ll see two main choices:
- Create and configure a single instance database (installs software + creates a DB).
- Set up Software Only (installs Oracle binaries for later DB creation).
For this guide, we’ll select “Set up Software Only”—ideal if you want flexibility to configure the database later.
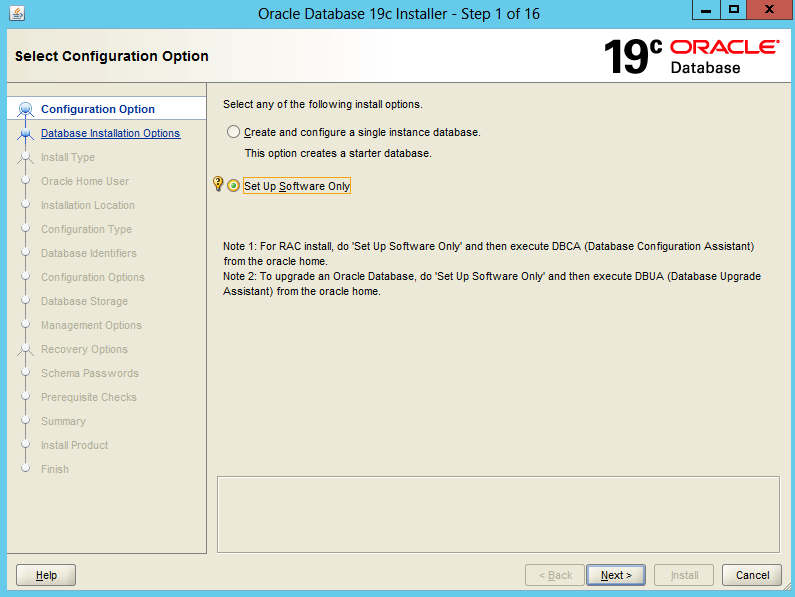
(This option also works for upgrading from older versions like 12c or 18c.)
Step 4: Select Installation Type
Next, choose between:
- Single instance database installation (standalone server).
- Oracle RAC (Real Application Clusters) (multiple servers accessing shared storage).
Since we’re installing on a single server, pick Option 1.
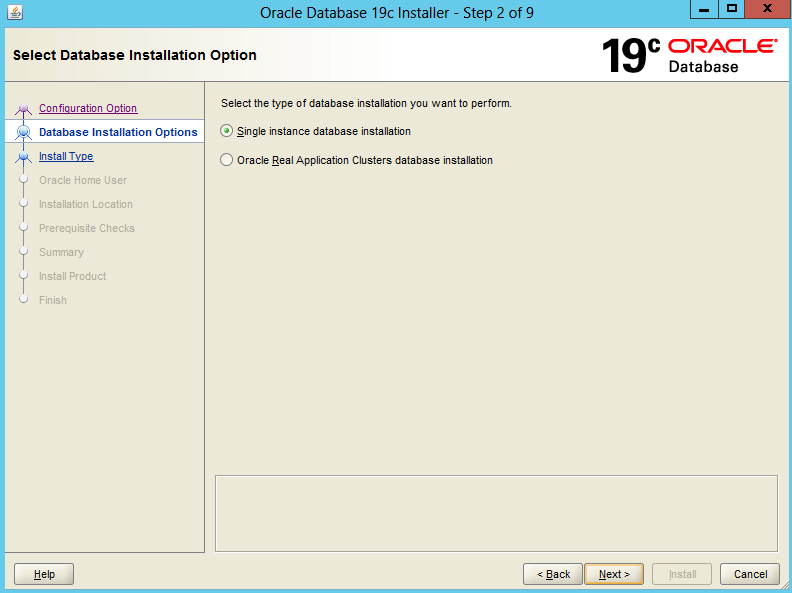
(You can create a database later using Oracle DBCA.)
Step 5: Choose Database Edition
Oracle offers two editions:
- Enterprise Edition (full features, best for large-scale deployments).
- Standard Edition (covers most needs for developers & mid-sized businesses).
Pick based on your requirements.

(Enterprise Edition demands more CPU, RAM, and storage.)
Step 6: Specify Oracle Home User
You’ll need to assign a Windows user for Oracle services. Options include:
- Built-in accounts (LocalSystem for Server, LocalService for Client).
- Virtual account (auto-managed by Windows).
- Custom Windows account (non-administrator, local or domain).
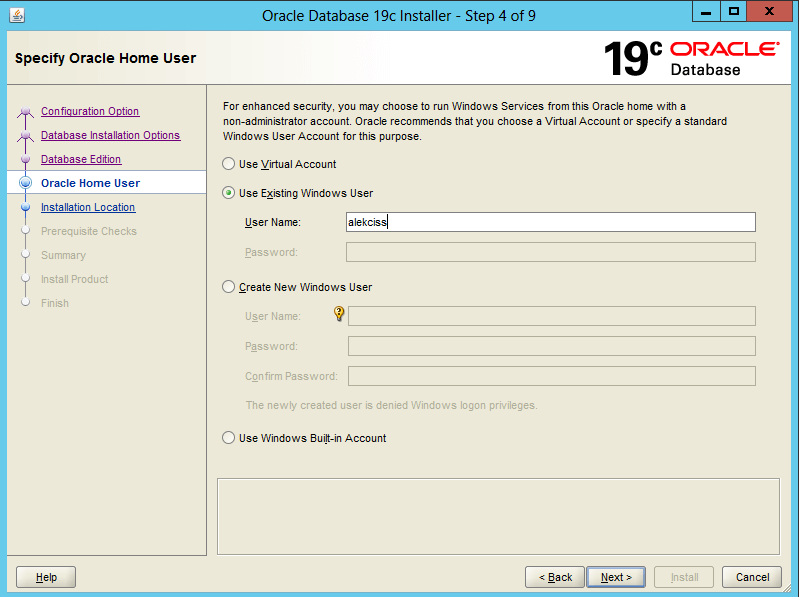
💡 If you enter a new username, the installer will create it automatically.
Step 7: Set Oracle Software Location
By default, Oracle installs to:
DRIVE_LETTER:\app\username
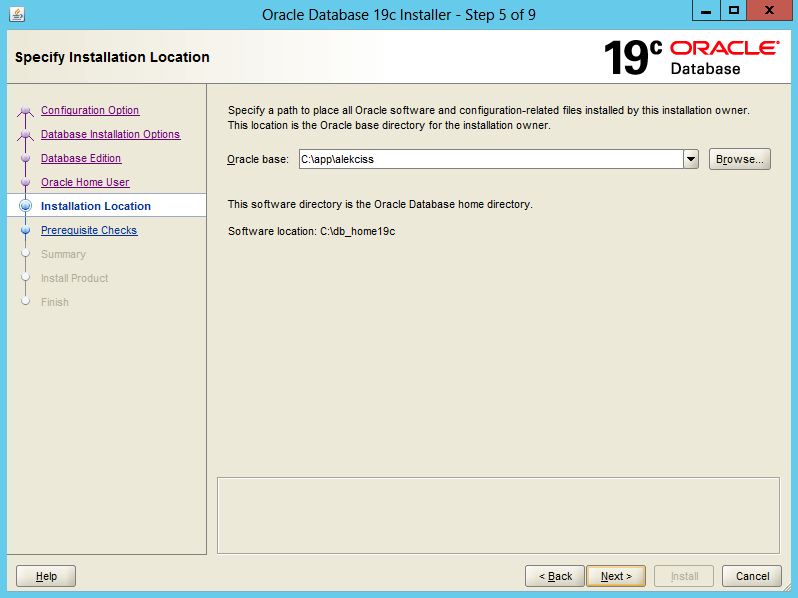
You can keep the default path or customize it.
Step 8: Prerequisite Checks & Installation
The installer will verify system requirements. If any issues arise:
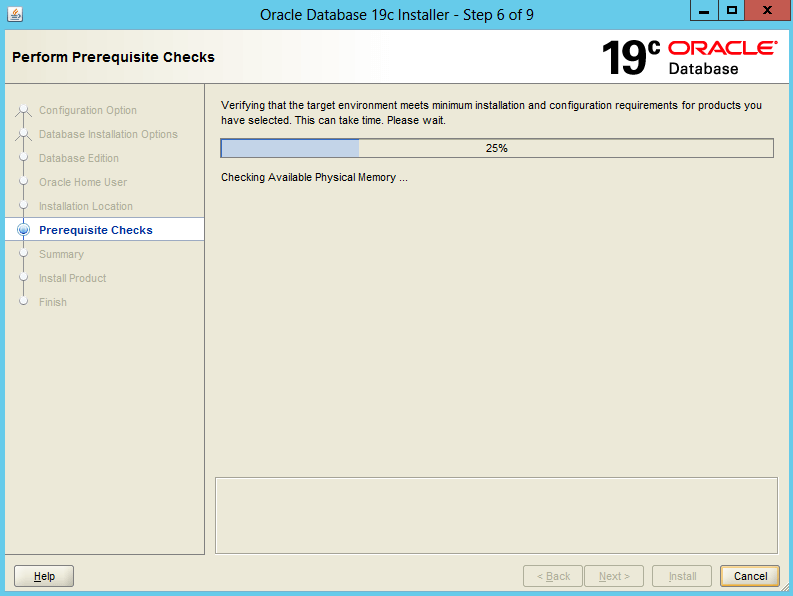
- Adjust settings (e.g., RAM, disk space).
- Retry the installation.
If all checks pass, click “Install” and wait for completion.
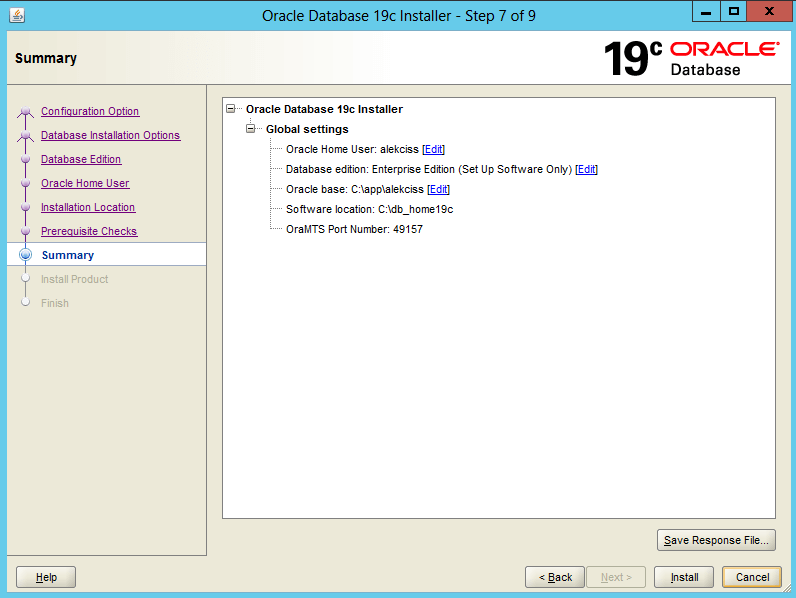
Done! Close the wizard once finished.

Final Steps & Verification
After installation, check the Windows Start Menu for Oracle components like:
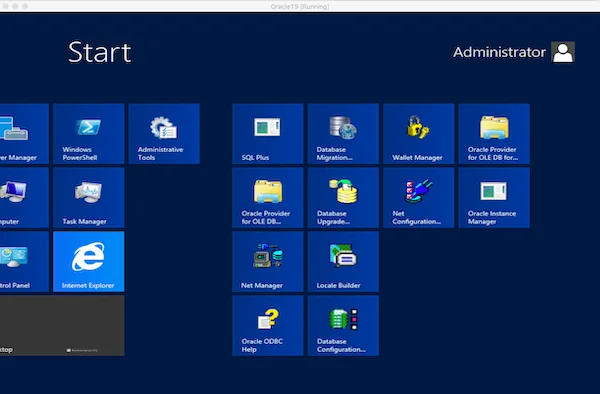
- Oracle Database Configuration Assistant (DBCA)
- SQL*Plus
- Oracle Enterprise Manager
What’s Next?
Now that Oracle 19c is installed, you can:
🔹 Create a new database using DBCA.
🔹 Configure network settings for remote access.
🔹 Optimize performance with Oracle’s tuning tools.